How to use voice models
Selecting, Downloading, and Packaging Models
The plugin supports multiple languages, voices, and qualities. You can easily download and manage the voice models you need via the plugin settings in the editor. Follow these steps to select, download, and stage the voice models:
- Open the project settings in the editor and navigate to Plugins -> Runtime Text To Speech.
- In the Available Voice Models to Download list, click the Download button next to the voice model you want to download. You can download multiple voice models simultaneously.
- After the download completes, the models will appear in the Downloaded Voice Models section at the top of the list, and they will be available for use in your project.
- Optionally, you can preview the downloaded voice models by entering text into the text field and clicking the Play button. This will synthesize and play the text using the selected voice model. This feature is useful for testing within the editor to ensure the voice model sounds as expected.
To delete any downloaded voice models, click the Delete button next to the model you want to remove.
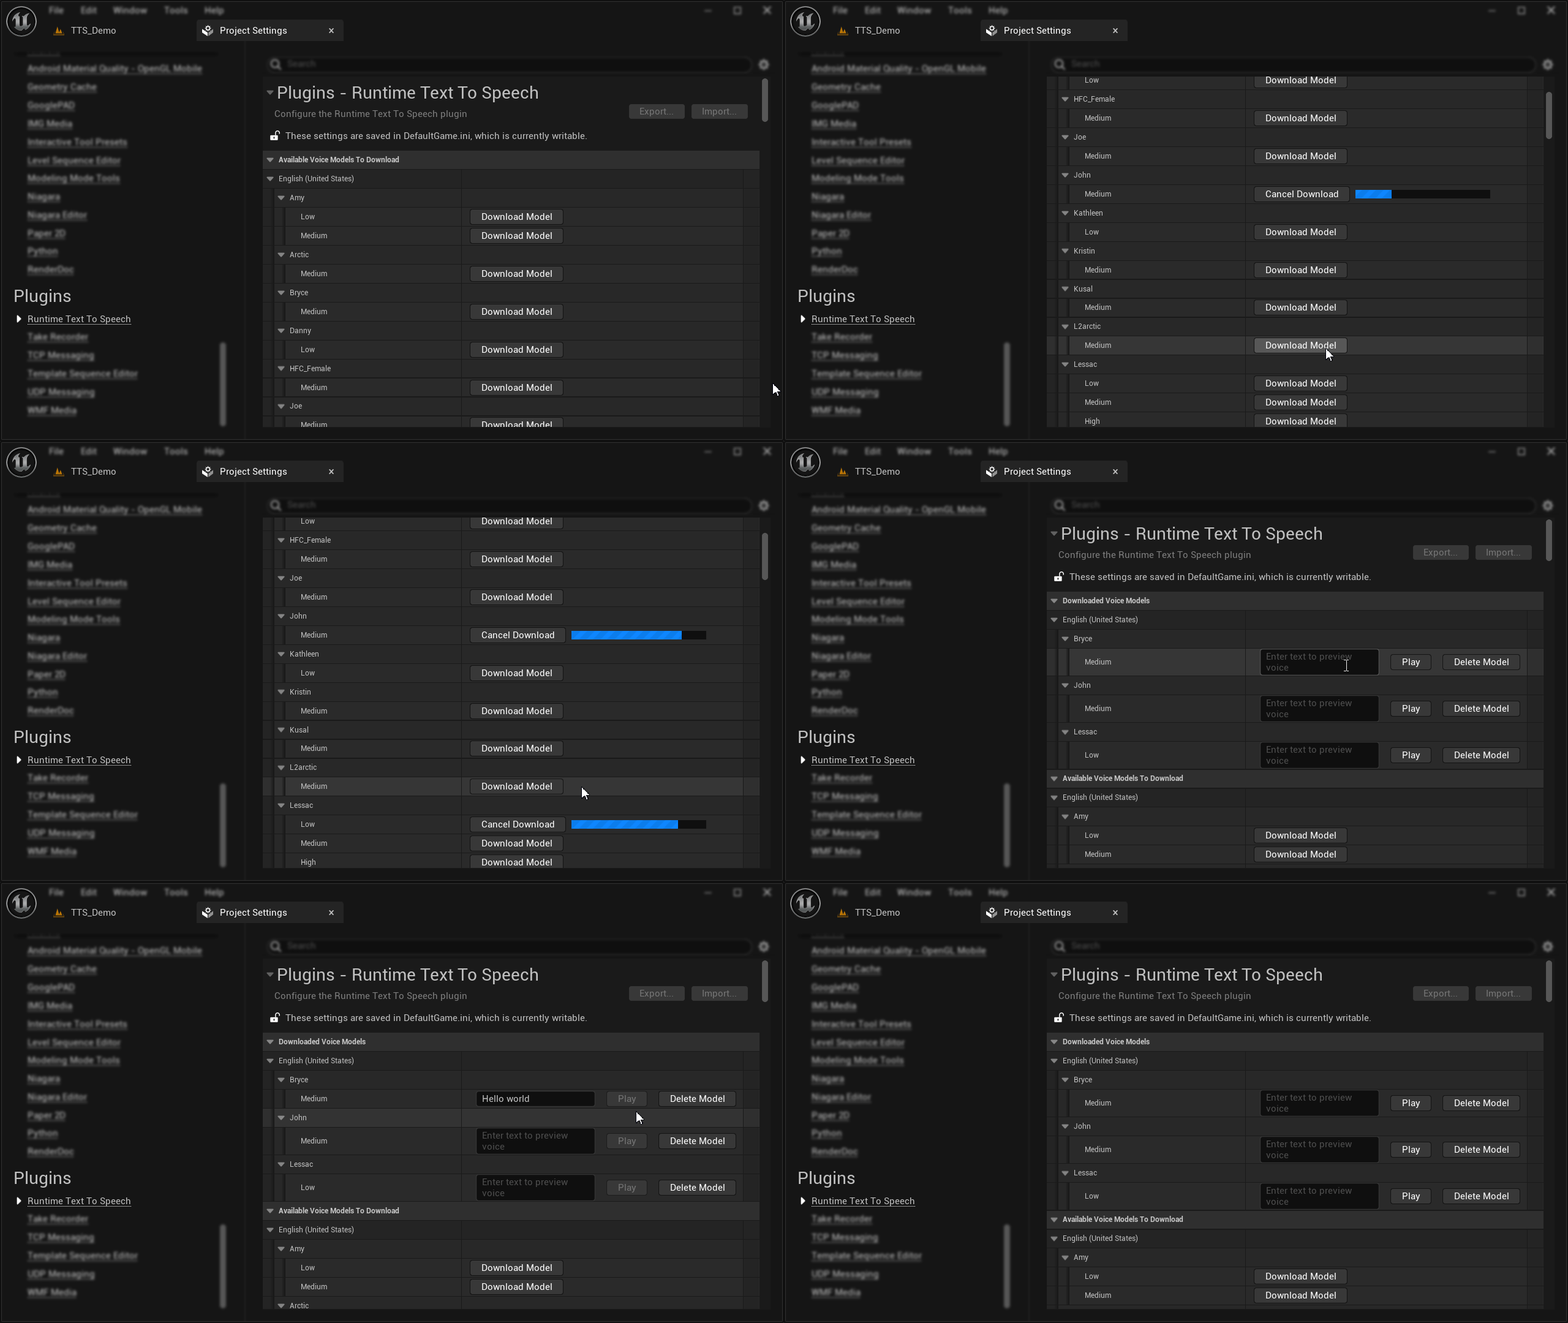
All downloaded voice models will be packaged with your project, so to reduce the project size, delete any voice models you no longer need.
For a complete list of languages that ship with pre-included models, see Supported languages.
Importing Custom Voice Models
In addition to the pre-configured voice models, you can import your own custom voice models. This is useful if you want to use a voice not available in the pre-configured list, or if you want to add support for a language that isn't shipped out of the box (see the list of additional supported languages for the list of additional languages supported by the underlying phonemizer).
The plugin supports both Piper and Kokoro voice model formats:
- In the plugin settings, click the Import Custom Voice Model button at the top of the screen.
- In the dialog that appears, select the model type (Piper or Kokoro).
- Browse and select your model file:
- For Piper: Select an ONNX format model file (*.onnx)
- For Kokoro: Select a BIN format style file (*.bin)
- Browse and select the corresponding configuration file (*.json):
- For Piper: This contains settings like sample rate, phoneme mappings, and inference parameters
- For Kokoro: This contains the tokenizer configuration
- For Kokoro models, specify the language code (e.g., en-us, en-gb-x-rp, fr, es, etc.)
- Click Import to add the custom voice model to your project.
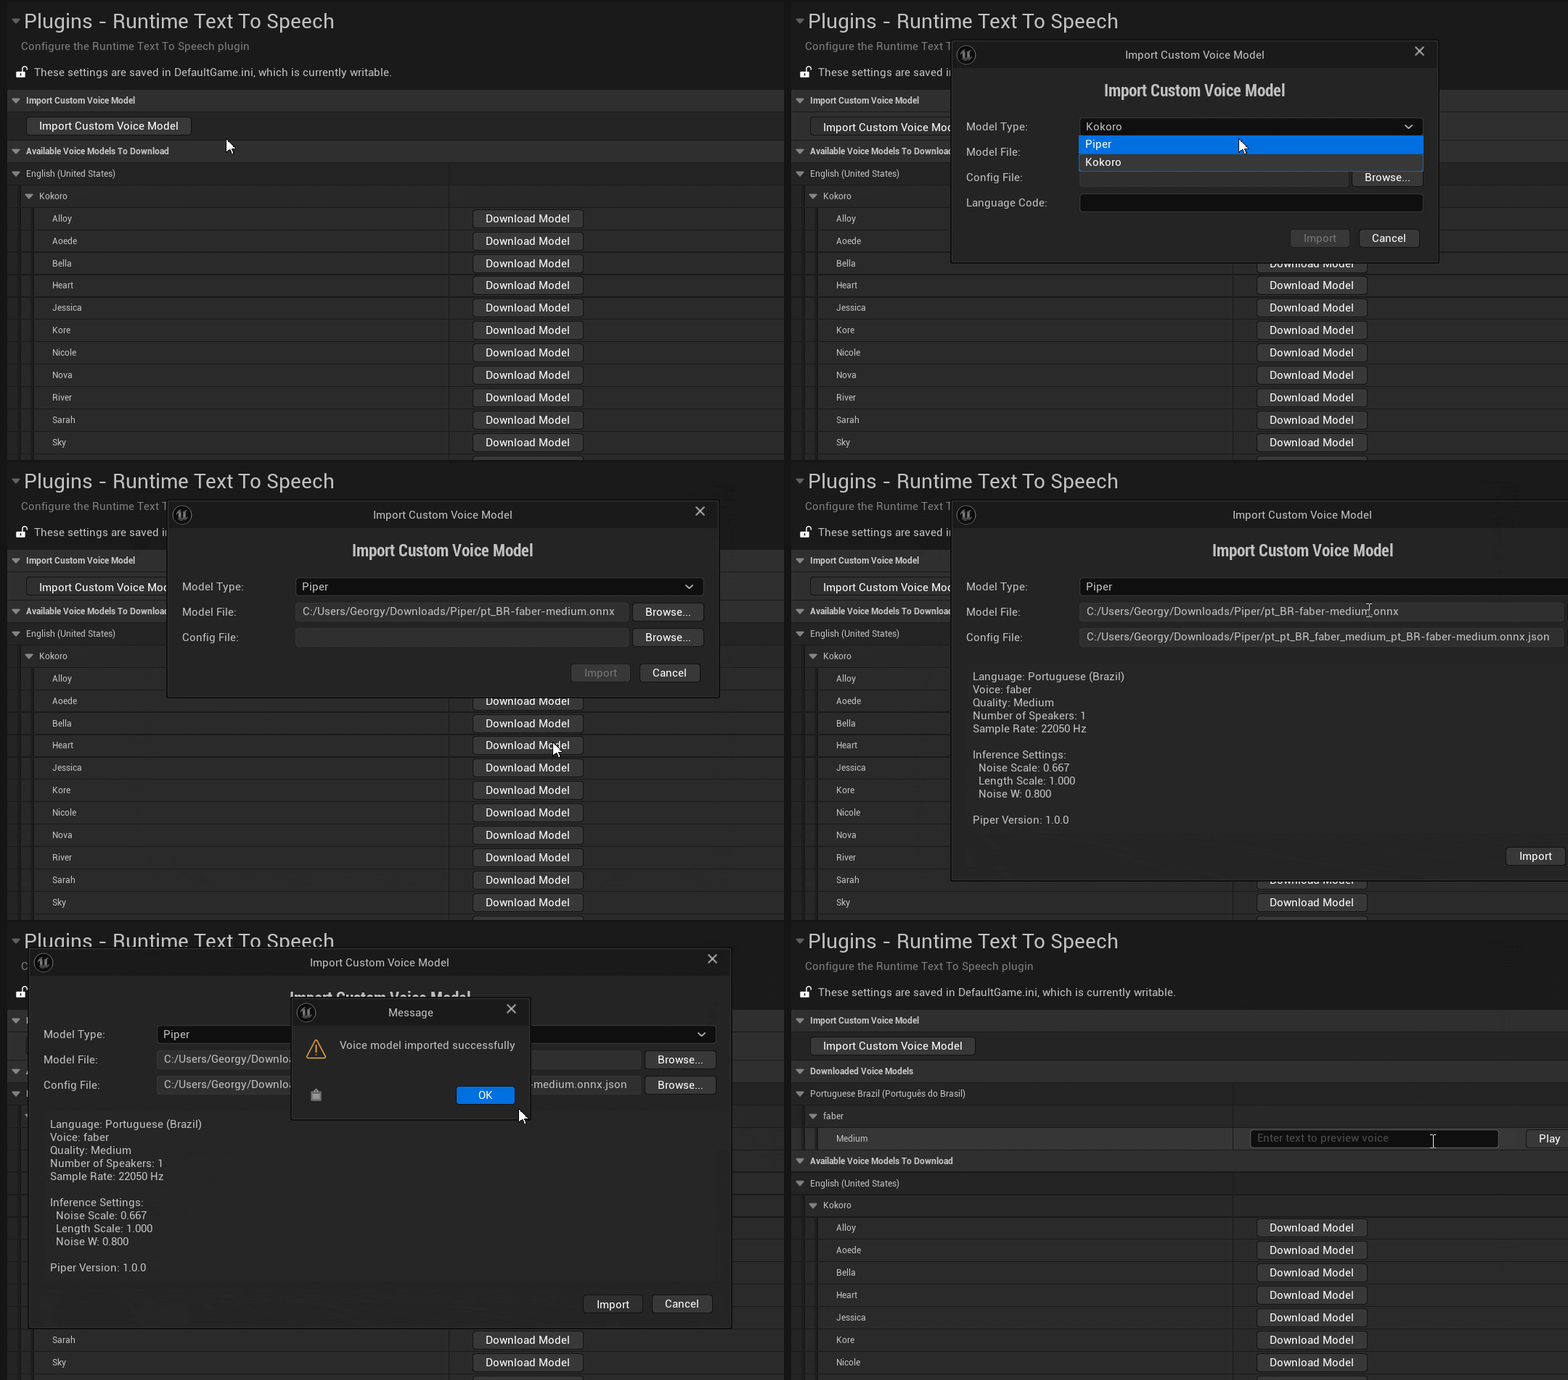
Notes on Custom Voice Models
-
Piper Models: You can use any Piper-compatible ONNX model with its matching JSON config file. This is useful for voices not available in the pre-configured list, or for custom-trained voices. You can find community-trained Piper models on Hugging Face, or train your own using this guide.
-
Kokoro Models: These models use a two-part system: style files (BIN format) and a shared ONNX model. When you import a Kokoro style file for the first time, the plugin will offer to download the required ONNX model automatically.
-
Language Codes: For Kokoro models, the language code is important for proper phoneme conversion. Common codes include:
- English (US):
en-us - English (UK):
en-gb-x-rp - Spanish:
es - French:
fr - Italian:
it - Portuguese (Brazil):
pt-br - Chinese (Mandarin):
cmn - Hindi:
hi - German:
de
- English (US):
Custom voice models are treated the same as downloaded models and will be packaged with your project.